
XCM provides you with a set of default Deliverables. You can also create Firm Specific Deliverables based on your requirements.
To create a Firm Specific Deliverable, you must have the Add System Specific Deliverables (System-wide) user right. See Assign User Rights.
From the Utilities menu, select Setup Utilities > Create Deliverables. This opens the Firm Specific page.
Firm Specific Deliverables

To create a Firm Specific Deliverable:
1. In the Firm Specific Deliverables page, click Add New Deliverable to open the Add New Firm Specific Deliverable page.
Add New Firm Specific Deliverable
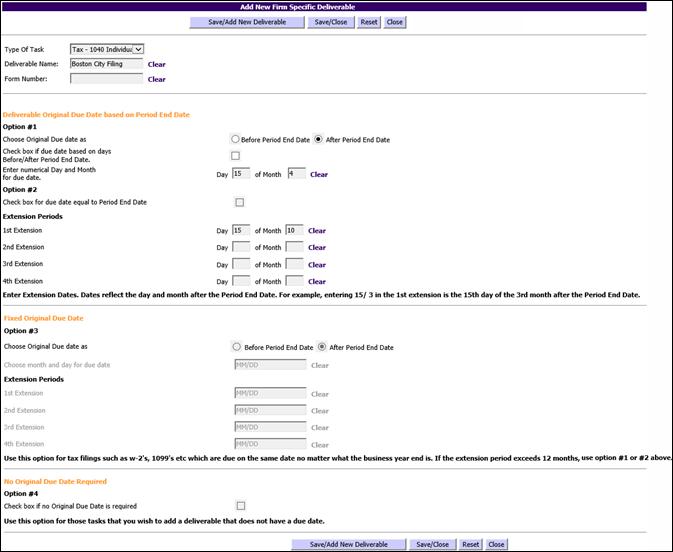
2. From the Type of Task drop-down list, select the Task Type associated with the new Deliverable.
3. In the Deliverable Name text box, type the name of the Deliverable.
4. In the Form Number text box, type the number of the form to be used for the Deliverable.
|
|
There are reserved letter combinations for statutory filings and you may see an error message when you save the Deliverable if a naming conflict is seen by the system. |
5. Select the method by which the due date will be determined relative to the Period End Date.
6. Enter applicable extension dates. You can enter a maximum of four extension dates in the Extension Period text boxes. (These dates reflect the day and month after the Period End Date).
7. You can now do one of the following:
•Click Save/Add New Deliverable to save the new Deliverable and to add another Deliverable.
•Click Save/Close to save and return to Firm Specific Deliverable page.
Add a Firm-Specific Deliverable to a Task
You can add a Firm-Specific Deliverable to a Task from your My View page and Control Sheet.
1. From the My View page, select the check box beside the Task for which you want to add a Deliverable.
2. Click the Task Info icon to view a menu.
3. From the menu, select Deliverables. This will take you to Task Information page that shows the current Deliverables.
4. Click Add Deliverable to open the Add Deliverable page. You can see the firm specific Deliverables listed under the General tab with the letters FSD appended to the Deliverable name.
5. Select the Deliverable you want to add to the Task and click Save.
You can view, edit, or delete existing Firm Specific Deliverables.
From the Utilities menu, select Setup Utilities > Create Deliverables.
Firm Specific Deliverables

1. Define your search criteria and click Search to display the Firm Specific Deliverables page with search results.
Firm Specific Deliverables with Search Results

2. Select the check box next to Type of Task to select the Deliverable you want to edit or delete.
3. Click Edit Deliverable to open the Edit Firm Specific Deliverable page.
Edit Firm Specific Deliverable
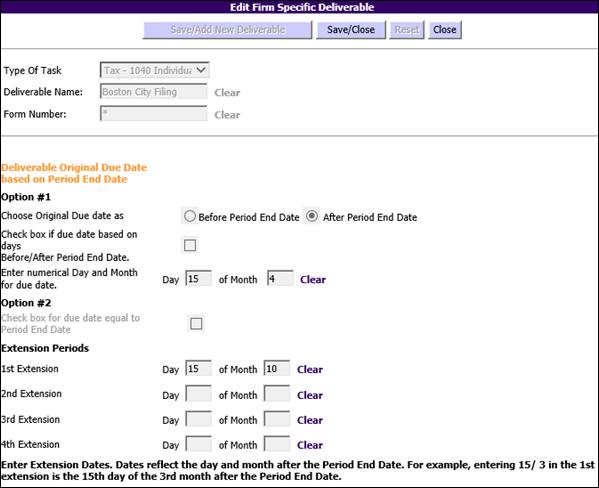
4. Make the necessary changes.
5. Click Save/Close to save the changes and return to the Firm Specific Deliverables page.
You can edit only one Deliverable at a time. To perform a bulk addition or deletion of any Deliverables in existing Tasks, use the Add/Delete Task Deliverables utility.
Manage Profile
This utility enables the administrator to modify the Firm Specific Deliverable profile of a Task such as the Deliverable Name, Form Number and Due Dates and apply the changes to the Tasks that have the deliverable added to it already.
You can apply the changes to:
•Tasks created after a specific effective date.
•All active Tasks and Tasks in the No Info In Status that have been created prior to the change.
|
|
To create or modify a Firm Specific Deliverable, you must have the Add System Specific Deliverables (System-wide) user right. Changes cannot be applied to a completed Task or a Task in the No Longer Client Status using this utility. |
From the Utilities menu, select Setup Utilities > Create Deliverables to open the Firm Specific Deliverables page.
Step 1: To edit the Firm Specific Deliverable for New Tasks
1. In the Firm Specific Deliverable Page, Select the Task Type and click Search to display the New Tasks you want to edit.
Firm Specific Deliverable Page
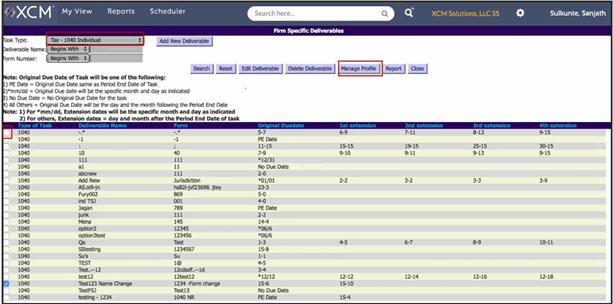
2. Select the check the box beside the relevant Type of Task and then click Manage Profile. This opens the Firm Due Date Manager–Manage Profile screen. The page opens to the Option #1 tab. This tab is used when you need a Deliverable Original Due Date based on Period End Date. You can select the Before Period End Date or After Period End Date and enter other information about the deliverable.
|
|
The Option #2 tab is applicable when you require the Due Date equal to Period End Date. The Option #3 tab is applicable when you require a Fixed Original Due Date. This can be set before the Period End Date or After Period End Date. The Option #4 tab is applicable when No Original Due Date is to be set for the deliverable. |
Firm Due Date Manager–Manage Profile
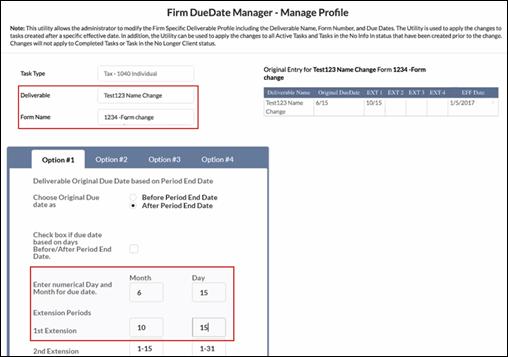
3. Make changes to the Deliverable Name, Form Number, and Due Dates as required.
Deliverable Original Due Date based on Period End Date
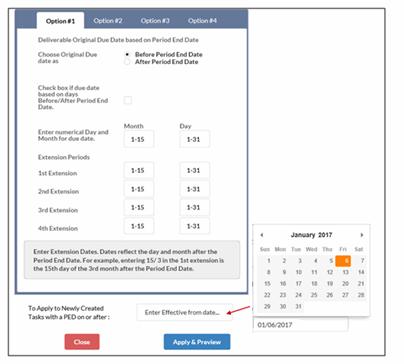
4. Click inside the Enter Effective from date text box to choose an effective from date from the calendar window.
5. Click Apply & Preview to update the Firm Specific Deliverable for all Tasks created with a Period End Date (PED) on or after the effective date.
Firm Due Date Manager-Manage Profile
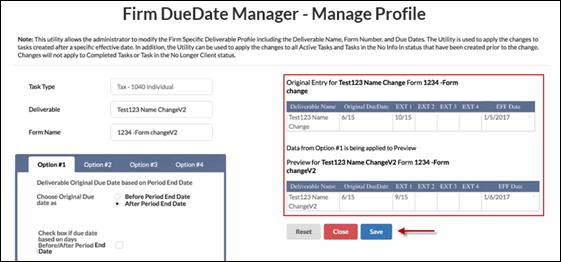
6. Review the changes that will be applied to the Tasks and click Save.
Step 2: To edit the Firm Specific Deliverable for Active Tasks
To apply changes to Active Tasks that have been created with a period end date prior to the effective date applied in Step 1 of this utility; go to step 3 and click the Apply to Existing Task Button, the Period End Date from will pre-populate the Effective date from Step 1. The Period End Date To has been pre-populated to 3 years from the Period End Date from. You can modify the pre-populated date.
Step 3: Update All Active Tasks
To update all existing Tasks with the new Period End Date, click Apply to Existing Task.

|
|
Changes made using this utility will impact All Active Tasks and Tasks in the Status of No Info In. This will NOT apply to Tasks in the status of Completed or No Longer Client. |