The Manage Groups utility enables you to create and manage client/entity groups. You can add and edit groups, change client/entity membership in groups, and mark groups as Active or Inactive. Inactive groups do not show up in Group list boxes. When you add a client/entity to a group, the utility provides multiple filters to make client/entity selection simple.
Client/Entity records can be searched based on the groups to which they belong.
From the Utilities menu, select Client/Entity/Group Utilities > Manage Groups.
To add a group:
1. From the Utilities menu, go to Manage Groups. This opens the Group Details page.

2. Select the Location or enter a Group Name and click Search to look for an existing group.
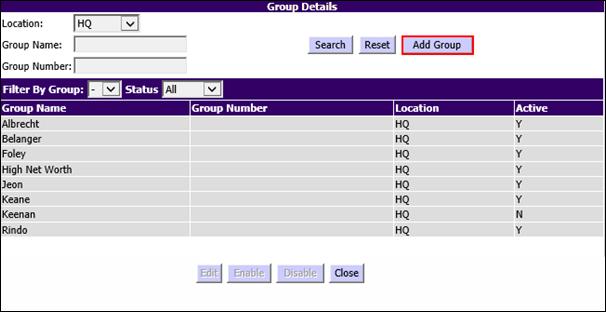
3. Click Add Group to add a new group. This opens the Group Details (Choose Client/Entity Remove Client/Entity) page.
Group Details (Choose/Remove Client/Entity)
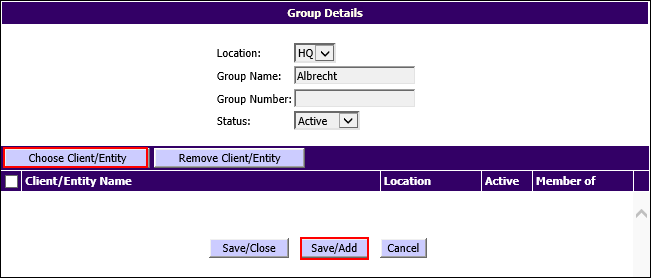
4. Select the Location enter the Group Name and the Group Number.
5. Select the relevant Status from the drop-down list.
6. Click Choose Client/Entity option to add the required clients to the new group you are creating.
Choose Client/Entity
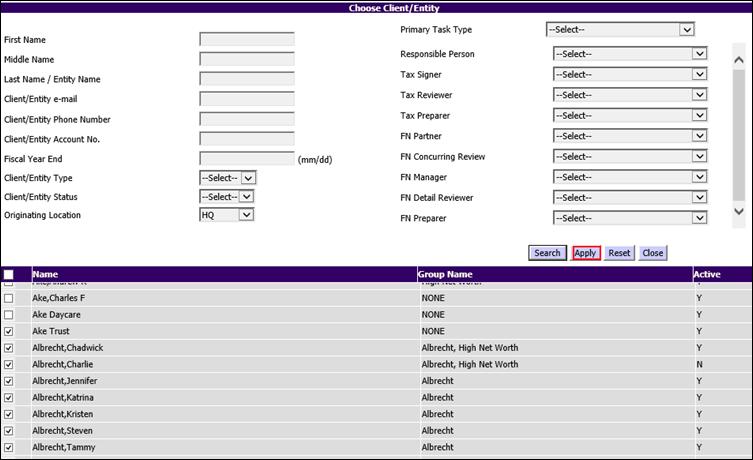
7. In the Choose Client/Entity page, you can search for the clients/entities with the filters provided.
8. Select the check box beside the name of the clients that you want to add to the group.
9. Click Apply. The chosen clients/entities are now added to the Group that has been created and displayed in the Group Details (Choose Client/Entity -Remove Client/Entity)(Choose Client/Entity-Remove Client/Entity) page.
Group Details (Choose Client/Entity -Remove Client/Entity)
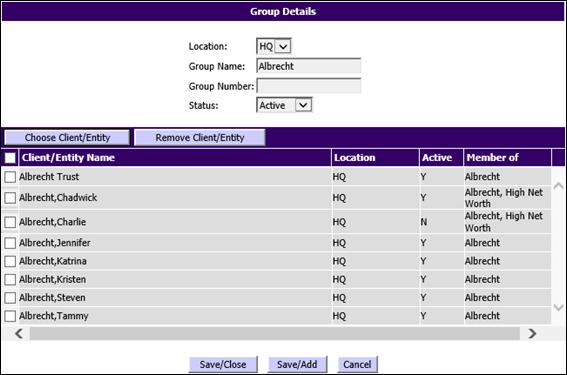
10. You can now:
•Click Save/Close to save the details and go back to the Group Details page.
•Click Save/Add to save the current group and to add a new group.
•Click Cancel to terminate the action.
To edit the details of an existing group:
1. From the Utilities menu, click Manage Groups to open the Group Details page.
Group Details
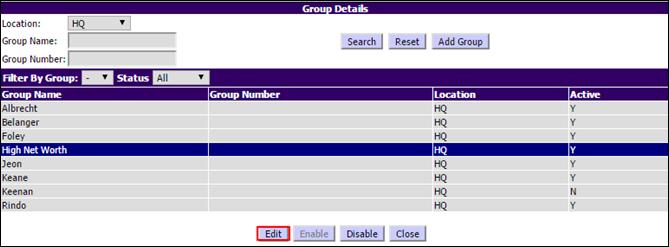
2. Select the Group Name to be modified and click Edit which is now enabled. The Group Details (Choose Client/Entity -Remove Client/Entity) page is displayed.
3. You can now:
•Add one or more clients/entities using the Choose Client/Entity option.
•Select the check boxes beside the Client/Entity Name and click Remove Client/Entity to remove a client/entity.
•Click Save/Close to save the changes and return to Group Details page.
To disable a group:
1. From the Utilities menu, click Manage Groups to open the Group Details page.
2. Select the Group Name that you want to disable.
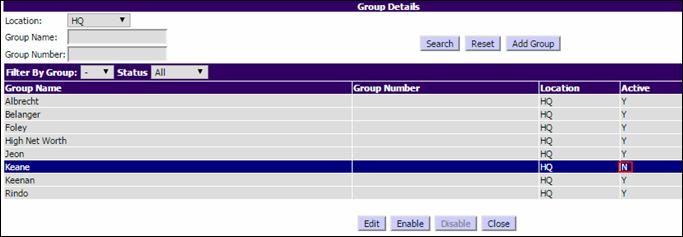
3. Click Disable, the selected group turns inactive and the Active column has the notation N as shown in the Group Details-Disable Group page.
