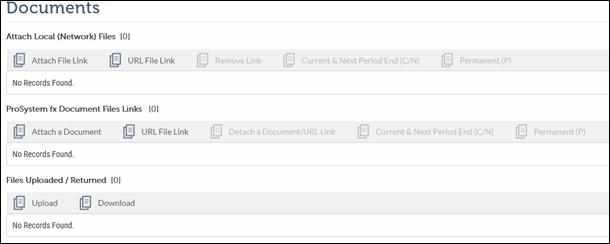
This section of the Control Sheet helps to efficiently and easily manage Tax-related documents. Tax-related reference documents include Tax application files, supporting information documents, spreadsheets, and PDFs necessary to complete a Task.
Documents attached to the original Task can be linked to a new Task that is created using a rollover or recurrence configuration.

XCM Integration Service
XCM has tight integration with CCH® ProSystem fx® Document management software and the Windows® File system. You can create links to files stored on the network of your firm and access the Tax reference documents necessary to complete a Task. The XCM Integration Service (XIS) feature enables you to manage the files and URL links as described in the following table.
XCM Integration Services
|
XCM Integration Service features |
Description |
|
Attach Local (Network) Files |
To attach one or more files and add URL links that contain information relevant to a Task (For example, a government site with the latest regulation). |
|
ProSystem fx Document Files Links |
To easily access relevant documents stored on either the locally installed CCH Document On-Premise(DOP) or the cloud-based CCH Axcess Document (Axcess) |
|
Files Uploaded/Returned |
To upload and download documents for Tax outsourcing (to send and receive files from Xpitax processing center). |
|
|
XCM Integration must be turned on for the firm by an XCM administrator so that the Task page displays the required interface. |
Attach Local (Network) Files
You can attach Tax reference files stored on the network of your firm and also provide additional information if required.
Click the  icon beside the Attach Local
(Network) Files to display the Attach Local (Network) Files
section.
Documents-Attach Local (Network) Files

You can do the following from this section:
•Attach and remove Tax reference files stored on the network of your firm.
•Add the URL address of a relevant website.
•On Portal <Placeholder-Pending info>
•Retain the attached documents to new Tasks created from the Main Task using rollover or recurrence configuration.
When you use this feature for the first time, an XIS dialog is displayed from where you can download the XCM Integration Service file.
XIS-XCM Integration Service
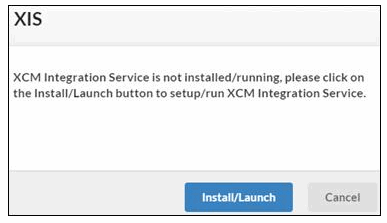
To download and install XIS:
1. In the XIS dialog box, click Install/Launch to download the XCM Integration Service installer.
XIS download-installation

2. The XCM Integration Service installer file is downloaded and displayed at the lower-left of the window.
3. Click on the installer file to proceed with the installation.
XIS-Installation
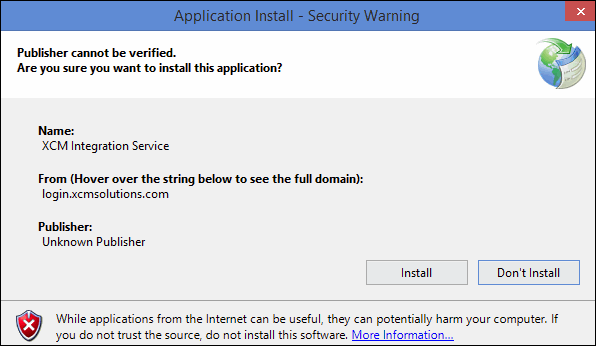
4. Click Install to install the XCM Integration Service file. You will see the installation progress dialog.
XIS-Installation Progress....
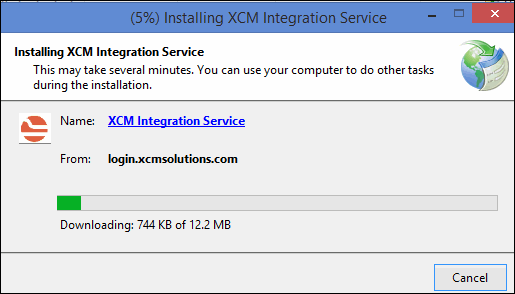
5. After the installation is completed, you can see the XCM Integration Service running (either from the Windows Start menu or from the notification area, at the lower-right of the task bar under the show hidden icons).
To attach local network files:
In the Attach Local (Network) Files section:

1. Click Attach File Link to select the files that need to be attached.
Select files for linking
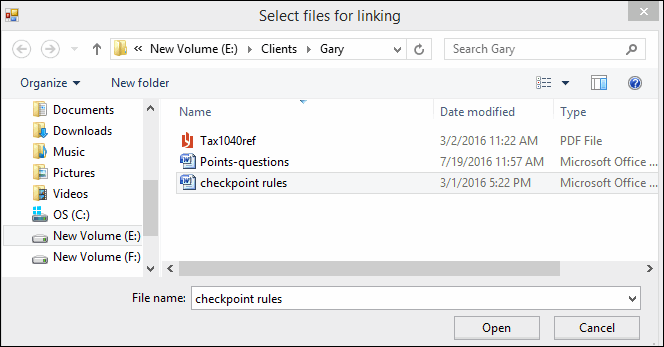
2. Select the file and then click Open to attach the document.
3. To attach multiple files, press Ctrl and Shift to highlight multiple files and then click Open to attach the files.
4. The Document Title column displays the name of the file attached and the location of the file on your network.
Documents-View Attached files

If you have accessed the file from a mapped drive, for example the S: drive, the file path displayed may be slightly different from what you see in the sample screen. However, the file can be located even if the mapped S: drive format is not displayed. Files on a mapped drive are linked from the Control Sheet and do not reside on the XCM server.
The XCM Integration Service helps to avoid connectivity problems when different users try to access the same file and assists your support engineer to diagnose and fix any problems.
5. Click the Enter Comments text box to open the Add Comments dialog box
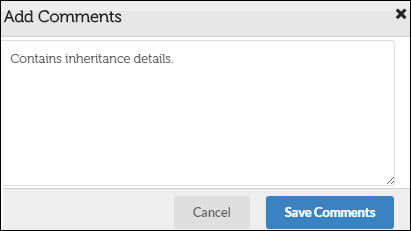
6. Enter comments to provide additional information related to the file uploaded.
7. You can now:
•Click Save Comments to save your comments.
•Click Cancel to return to the Documents page.
You can do any of the following in the Documents page:
•Click Current & Next Period End (C/N) to keep the link on the next Task automatically created from this Task in a rollover or recurrence configuration.
•Click Permanent (P) to keep the links on all future Tasks automatically created from this Task in a rollover or recurrence configuration.
•Click Remove link to remove a file link or URL file link attached to a Task.
The number of files attached to a Task is displayed beside Attach Local (Network) Files.
If you attempt to open a link to an attached file, and the file has been moved or deleted from its original location on the network, you will see the following error message.
|
Contact your local support personnel to determine where the file is currently located. Remove the file link and then attach it from its current location as described in the following section.
To Remove a File Link or URL File Link:
You can remove an attached file or URL file link attached to a Task.
Sometimes the files you have attached might have been moved or deleted from its original location on the network. If you cannot find your file, you need to remove the existing links using Remove Link and then attach the files from the current location.
Documents-Remove link

In the Attach Local (Network) Files section:
1. Select one or more files that you want to remove.
2. Click Remove Link to remove the selected files/URL File links attached to a Task.
To open and edit attached (Network) Files:
You can open and edit the attached files directly from the Control Sheet without having to use My Computer and browse for them.
Documents-Attached files

1. Click on the relevant file under the Document Title column to open it. The file opens in the format associated with it.
For example, if you click Tax1040ref.pdf, Adobe Acrobat Reader automatically opens the file because of the pdf extension.
2. You can read or edit the file and save your changes.
To add a URL File Link:
You can add a URL File Link to a Task to access relevant information for filing returns.
1. Click the URL File Link action button to open the URL File Link page.
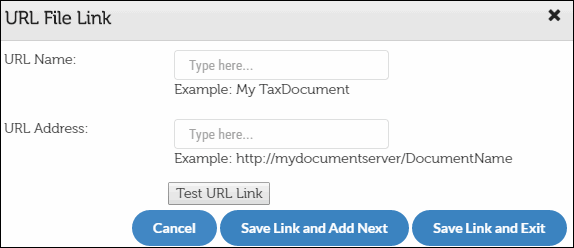
2. In the URL Name text box, type a name for the URL.
3. In the URL Address text box, enter the URL of the website that contains reference documents required for a Task.
4. Click Test URL Link to ensure that the URL link is accessible before you save the URL link details.
5. You can now do one of the following:
•Click Cancel to clear the details.
•Click Save Link and Add Next to add another URL link.
•Click Save Link and Exit to return to the Documents section.
ProSystem fx Document File Links
This section allows you to access Tax related reference documents (CCH ProSystem fx document files) stored in the document management system (CCH) of your firm and also lets you to specify the URL of the files.
In Documents, click the icon
 beside ProSystem fx
Document Files Links. This opens a page where you can manage your ProSystem
fx documents.

For more details on working with ProSystem fx Document files, see the XIS User Guide.
Files Uploaded/Returned
This feature allows firms to upload Tax specific files to the XCM server for outsourcing to XPITAX. After the Task is processed, XPITAX can link the completed version of the file to the Control Sheet for the firms to download.
Click the icon  Uploaded/Returned in the
Documents section of the Control Sheet to display a page that shows
details of files uploaded and returned.

To upload a file:
1. Click Upload to open the File(s) Upload/Download page.
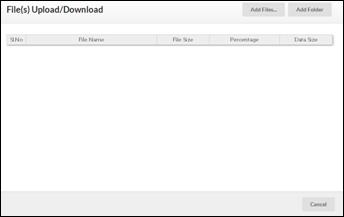
2. Click Add Files to navigate to Windows Explorer and select one or more files you want to upload as shown. (Use CTRL or Shift key to select multiple files)
3. Click Open to view the progress of files selected for upload.
4. Click Add Folder to select all files from a specific folder for upload. All the files from that folder will be uploaded. However, files from sub-folders will not be uploaded.